How to Use Watermark Template Presets for Field Photos
Once a team processes more than a few photos, the real challenge is not adding a timestamp once. It is adding the same layout again tomorrow without rebuilding every setting from scratch.
Watermark template presets solve that problem. They give you a repeatable starting layout for common field workflows.
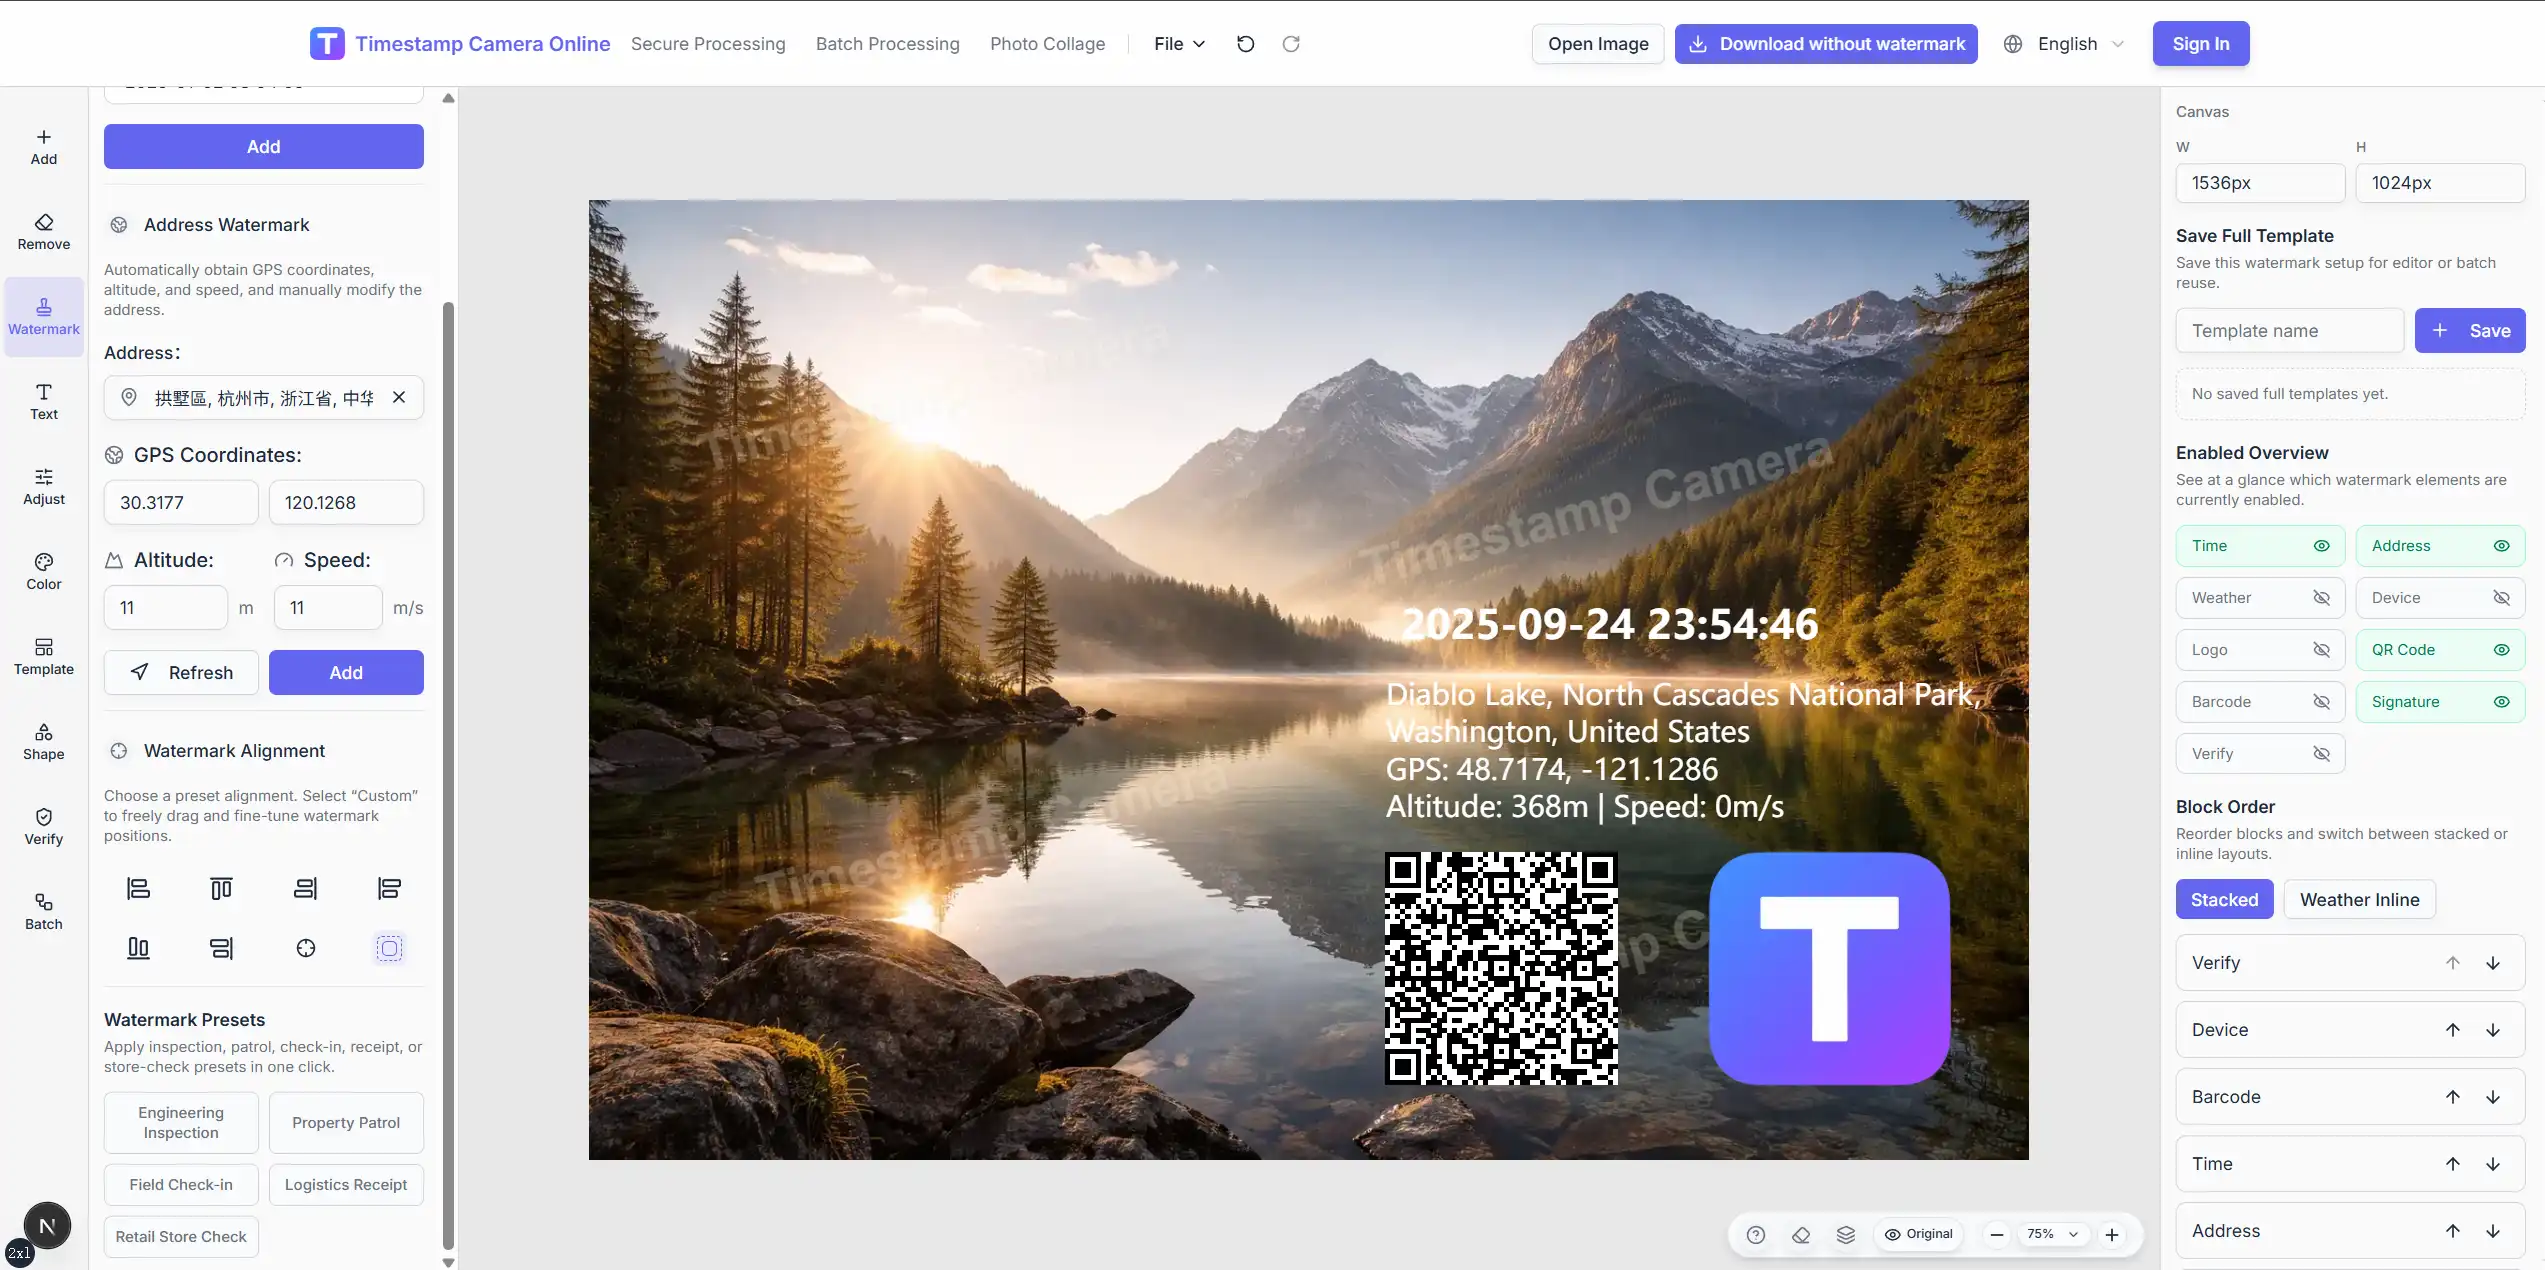
What template presets are for
A watermark template preset is a ready-made layout structure. It can combine elements such as:
- time block
- location line
- summary text placement
- logo or signature position
- proof-style formatting
Templates are most useful when your team needs stable output, not maximum freedom on every image.
Where to find them
Open the editor, upload your photo, then use either of these paths:
Watermark panel presets
In Watermark, the primary view includes preset layouts near the time and address blocks. These are a fast way to apply a common proof structure.
Template panel
Select Template on the left for a broader preset workflow. This panel is better when you want to start from a fuller layout and then fine-tune layers.
When templates are the right choice
Use a template when:
- many photos in one project should look the same
- new team members need a safe starting layout
- inspection or patrol photos must follow a house format
- you want time, location, and summary text arranged consistently
Use manual editing instead when every image needs a unique composition.
A practical template workflow
Step 1. Pick the scenario first
Choose the template that matches the job, such as engineering inspection, property patrol, logistics proof, or field check-in.
Step 2. Apply the preset before micro-editing
Let the template place the main structure, then adjust only the fields or layers that the photo actually needs.
Step 3. Review hierarchy in the preview
The template should make the record easier to read. If the layout feels crowded, remove secondary lines instead of shrinking everything.
Step 4. Save team habits around a small preset set
Teams work faster with a few trusted templates than with dozens of rarely used ones.
Need the same layout across many photos?
After you settle on a template style, batch mode helps apply one shared rule to a larger photo set.
Best practices
Keep one template per report type
Inspection photos, delivery proof, and patrol photos often need different information density.
Do not fight the preset
Templates work best when you adjust content, not rebuild the entire structure every time.
Pair templates with batch presets for repeat work
If the same setup is used daily, save it for both single-image and batch workflows.
Common mistakes
Choosing a template that includes fields you do not need
Remove unused lines so the photo stays readable.
Applying a formal proof template to casual photos
Match the layout to the audience.
Changing template style on every export
That creates archives that are harder to scan later.
Related guides
Final takeaway
Templates turn repeated documentation work into a stable format. Choose the preset that fits the scenario, adjust only what the photo needs, and keep your team on a small set of trusted layouts.