How to Get Started with the Timestamp Camera Editor
If you already have a photo and want to add a visible timestamp, location block, logo, or cleanup layer, the fastest path is the browser editor. You do not need to install desktop software or move files through multiple apps.
This guide focuses on the Add area on the left side of the editor, because that is where most workflows begin.
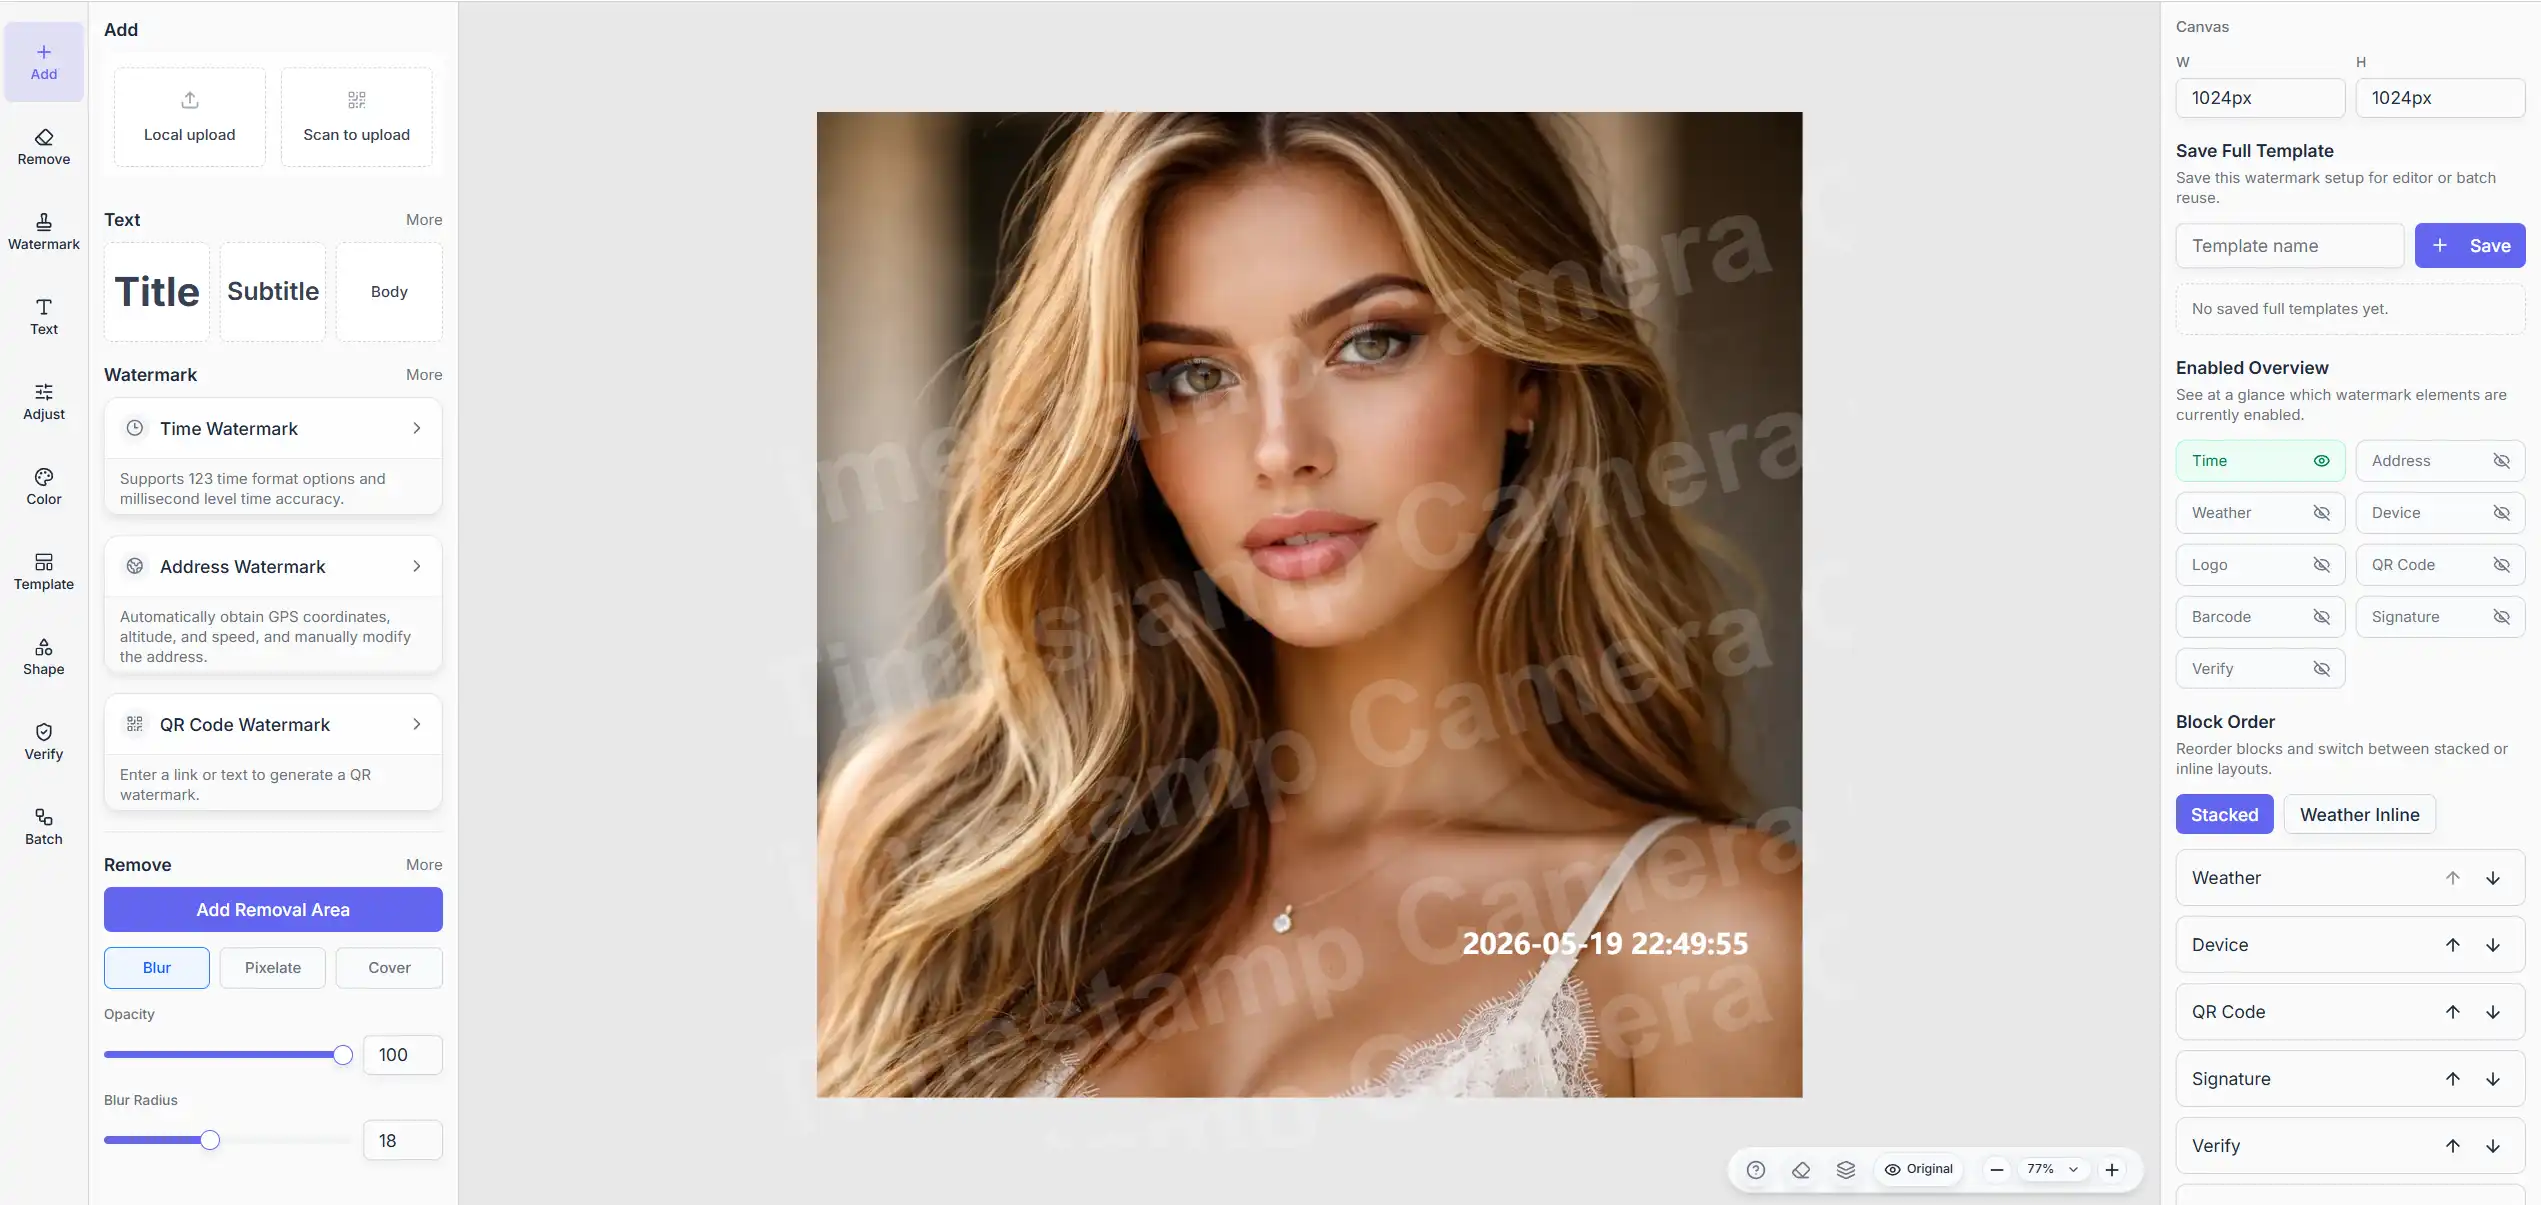
What the left sidebar is for
The editor is organized by task, not by one long settings list. On the left, you will see modules such as:
- Add for upload and quick starter content
- Remove for covering or blurring sensitive areas
- Watermark for time, location, logo, codes, and related overlays
- Text for reusable documentation blocks
- Adjust for crop, rotate, and framing cleanup
- Color for exposure and tone correction
- Template, Shape, Verify, and Batch for repeatable or proof-oriented output
You do not need every module for every photo. Start with Add, then open only the panel that matches the job.
Step 1. Upload your photo
Open the editor and use the upload area in the Add panel.
Supported image formats include common types such as JPG, PNG, HEIC, BMP, and WebP. After upload, the preview updates immediately so you can judge placement before export.
If you are working from a phone, you can also use the QR upload flow on desktop to move a photo into the same editing session.
Step 2. Use quick text fields when you need a simple note
The Add panel also includes title, subtitle, and body fields. These are useful when you want a short documentation block without building a full custom layout first.
Typical uses include:
- site name or project label
- inspection note
- handoff summary
- short status line for a report photo
If you need a fuller text workflow, open the dedicated Text panel for templates, favorites, and variable inserts.
Step 3. Start with the most common watermark blocks
From Add, you can jump into the core watermark tools without hunting through every setting:
- Time for the visible date and time line
- Address for location text or coordinates
- QR code when the image should link to a record page
Tap More in the watermark section when you also need logo, weather, barcode, signature, or device details.
Only need a quick timestamp?
If your task is simply adding visible date and time, start from the timestamp page and open the full editor only when you need more control.
Step 4. Check the preview before export
The center preview shows the final composition. Use it to confirm three things:
- The timestamp or text is readable on the actual background.
- Important subjects are not blocked by overlays.
- The image orientation and crop still fit your report format.
Step 5. Export the finished image
When the layout looks right, export in the format that fits your workflow. For team archives, keep one consistent date format and one standard corner position across similar photos.
Where to go next
Depending on your task, these paths are usually the most useful next steps:
- Add timestamp and location: when time and place belong in one block
- Edit timestamp on photo: when you need to correct an existing visible stamp
- Hide sensitive information: before sharing photos that contain plates, addresses, or ID details
- Batch watermark: when many photos should share one layout rule
Final takeaway
The editor is easiest to use when you treat the left sidebar as a set of focused tools. Upload in Add, open only the module you need, review the preview, then export. That keeps simple jobs fast and complex documentation workflows still within reach.